How to Connect to Ec2 Tomcat Again
In this tutorial, nosotros will learn how to create an EC2 server on the AWS Cloud and setup Coffee and Tomcat on that server.

Please note that in this tutorial, nosotros are going to exercise some basic server setup (which is already been explained over final published tutorial, delight read How To Launch An AWS EC2 Server And Set Ubuntu sixteen.04 On It ).
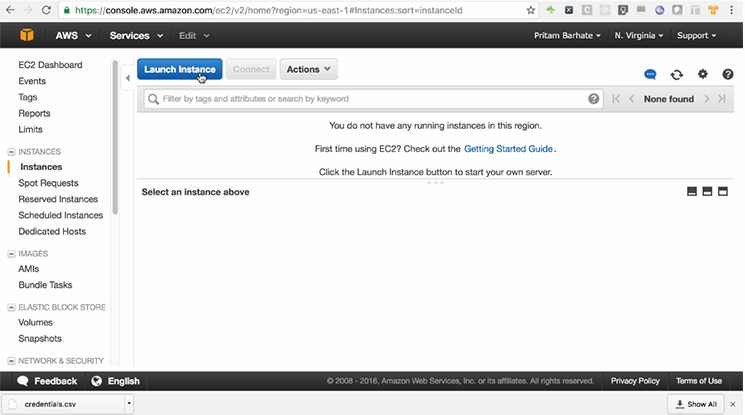
Firstly, nosotros would be creating a server past logging into an EC2 account.
We demand to get to the EC2 dashboard to launch example. At present, we are going to do step by step of basic server setup:
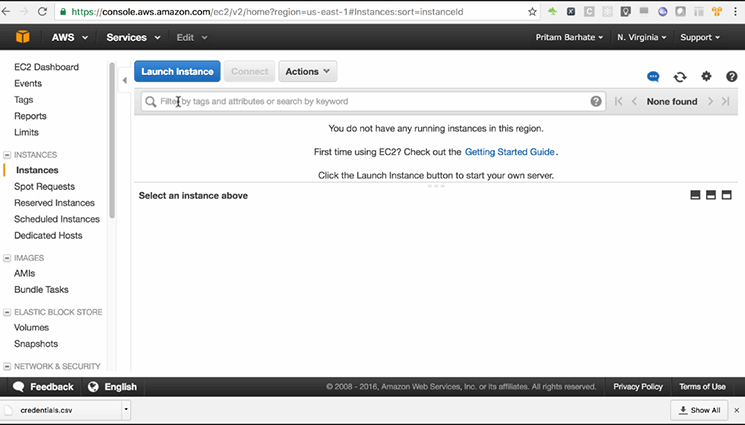
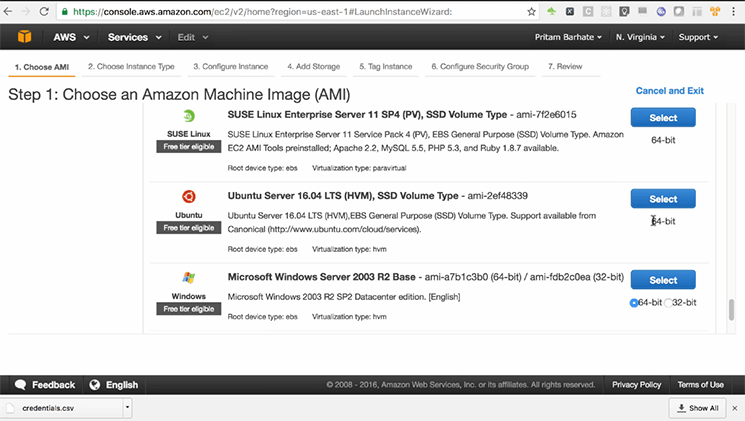
Step 1: Select Ubuntu sixteen.04 (64 fleck) on your EC2 dashboard;
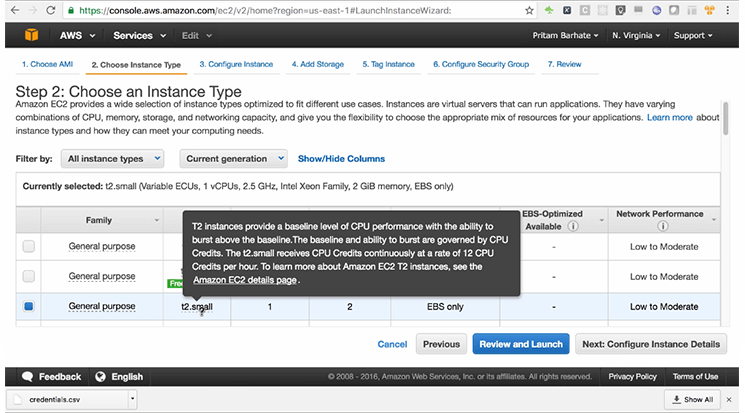
Step 2: Utilise t2.pocket-sized as Coffee generally requires more than RAM;
Pace iii: Enable Protection confronting accidental termination, other than that, go on other settings every bit information technology is;

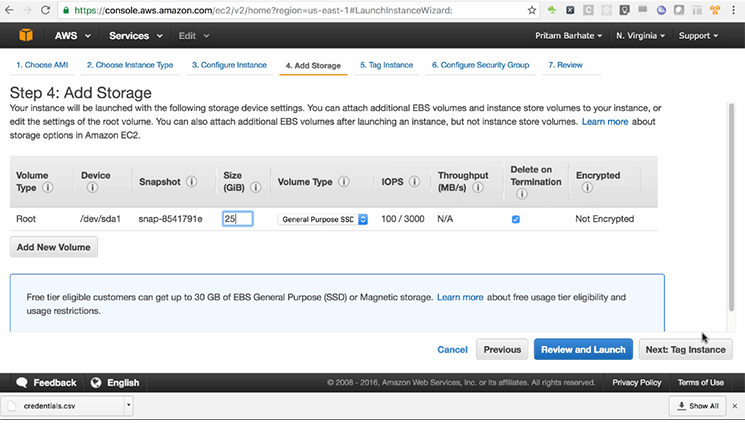
Pace 4: For storage, use 25 GB, General purpose SSD;
Step 5: Tag Instance: Enter value as "Javasetup"
Footstep 6: Configure Security Grouping, In this, you can either use/select the existing security group or can create a new security grouping. We volition create a new one and will give it a name and a clarification:
-
- Security Grouping Name: JavaSetup
-
- Description: Security Group created for Java setup
Blazon: SSH
Protocol: TCP
Port range: 22 (for now)
Source: Anywhere
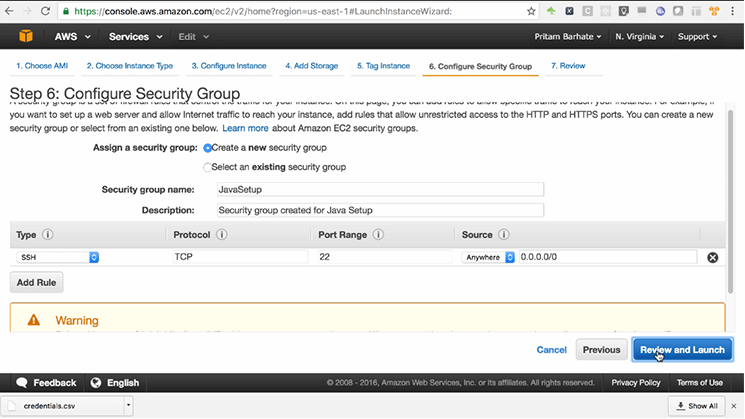
Pace vii: Review Instance Launch and if information technology looks fine then continue.
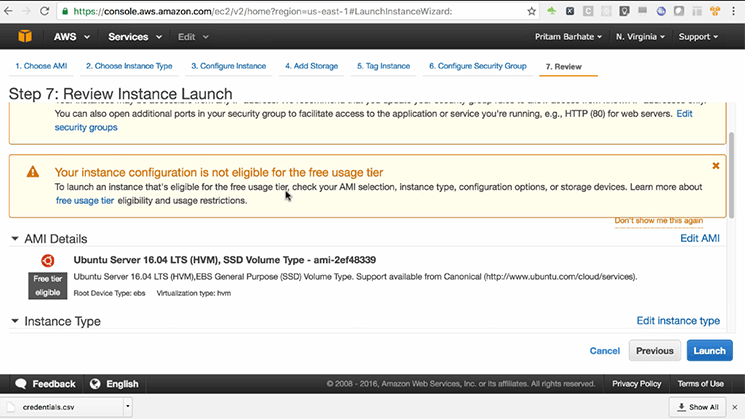
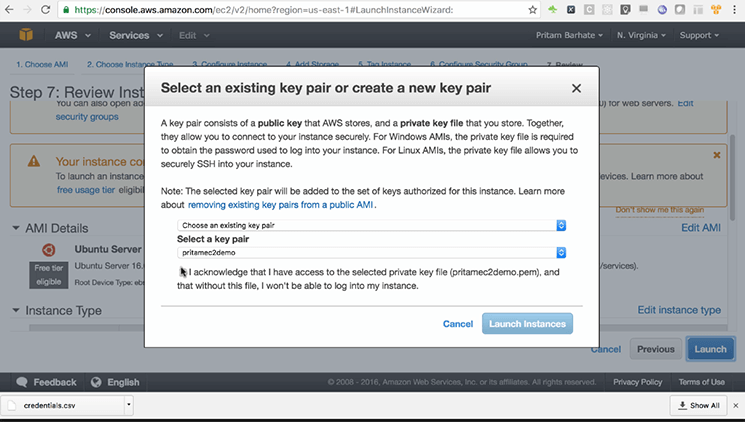
Now, select 'Launch'. When you do that, a dialog box would popular upwards giving you an option of selecting an existing key pair or creating a new key pair.
Here, nosotros are going to use an existing key pair. It's OK, if you might want to create a new set of key pair.
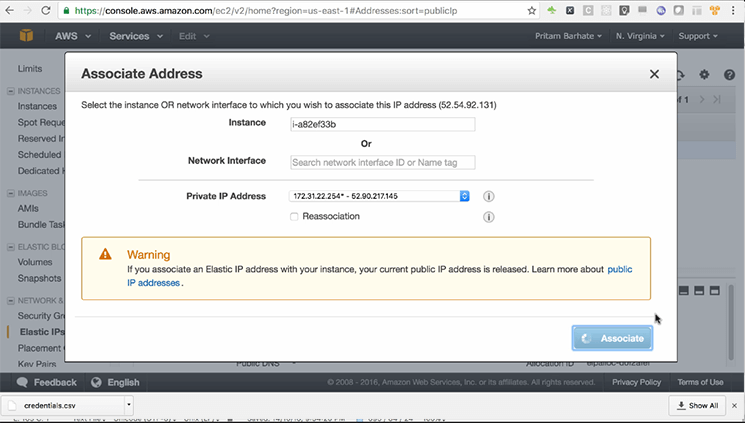
For this instance, we require Elastic IP address. So, while it launches I will provision for it.
Check if your example is working. Now, you need to associate the Elastic IP with our Coffee setup server.
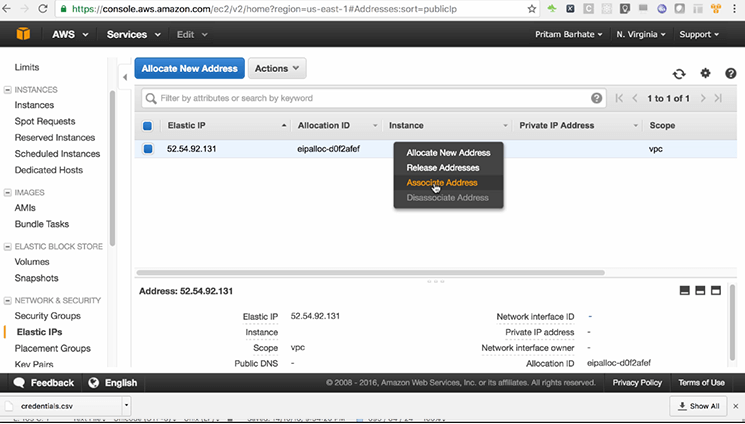
Become to >>
Instances>Elastic IP Address
Now, review if Elastic IP Address is present.
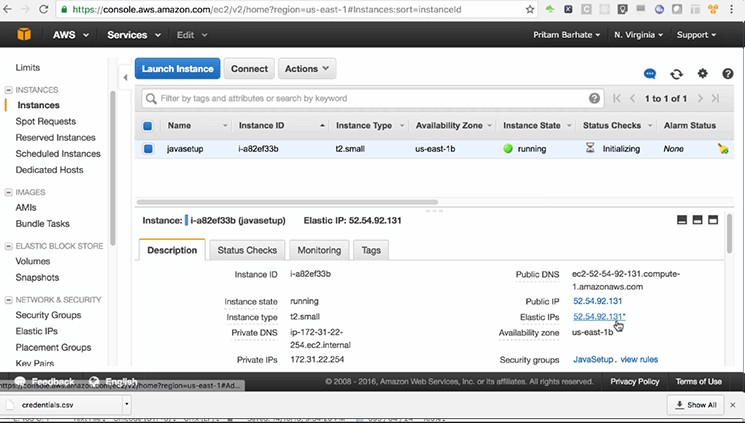
Now, I used to do the SSH login to the server.
Post that, nosotros volition run through the basic server setup. (You can refer to the previous tutorial on basic server setup)
We'll have to wait for a couple of minutes then it will restart. When the system is dorsum on, proceed through the further process of setting up of the JDKs and the Tomcat servers:
From now on, our preferred JDK would exist Open JDK because virtually of the beanstalk installation too every bit Heroku prefers Open JDK. Therefore, nosotros demand to add an apt-get source from where JDK is installed.
To add apt-go source, please run this command:
$ sudo -E add-apt-repository ppa:openjdk-r/ppa
When the source is added, update by running this control:
$ sudo apt-get update
Nosotros'll acquire, now, how to install multiple versions of JDKs and how to switch between them. The first 1 is Open JDK vii, for its setup run this command:
$ sudo apt-get install openjdk-7-jdk
Now, how to check if the in a higher place setup is done or non?
Run this command on the directory:
>>
$java -version
When you run this control, you'll go this as a result:
#-> java version "i.seven.0_95" #-> OpenJDK Runtime Surround (IcedTea 2.6.4) (7u95-two.six.iv-iii) #-> OpenJDK 64-Bit Server VM (build 24.95-b01, mixed mode)
Similarly, now we want to cheque JavaC version. For that, we need to run this command:
$javac -version
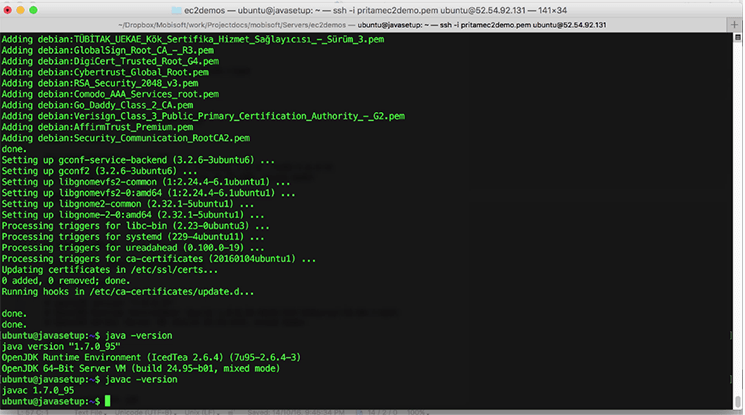
It'due south again 1.7.0_95
Following the same process, we would now install Open JDK 8 and run this command:
$sudo apt-get install openjdk-8-jdk
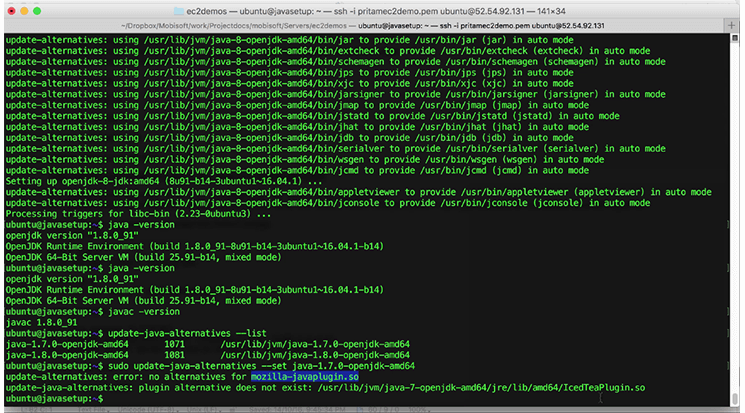
After this, we will check the Coffee version:
$java -version
When you run this command, you'll get this equally a result:
# openjdk version "one.8.0_91" # OpenJDK Runtime Environs (build 1.8.0_91-8u91-b14-3ubuntu1~16.04.1-b14) # OpenJDK 64-Chip Server VM (build 25.91-b14, mixed way)
Now, we volition cheque Javac version and run this command:
$javac -version
Information technology's also 1.8.0_91
# javac 1.eight.0_91
Now, let's endeavor to switch back to JDK-7 for that command is:
$update-coffee-alternatives –list
This shows which JDKs are installed and what's the value of JAVA_HOME for each of those.
Nosotros would now want to switch to this:
coffee-1.7.0-openjdk-amd64
And then, we will practice that by running this control:
$sudo update-java-alternatives --set coffee-one.7.0-openjdk-amd64

Unfortunately, it fails because at that place'due south some problem with Mozilla-javaplugin.
To prepare this upshot, nosotros demand to install that very plugin and for that we would crave a ppa-source. You tin can add together it by running this command:
$sudo add together-apt-repository ppa:maarten-fonville/ppa
At present, we need to update the apt-become sources again!
For that, we want to run this command:
$sudo apt-get update
Now, these are the commands for:
# For JDK vii plugin
sudo apt-get install icedtea-spider web
# ForJDK 8 plugin
sudo apt-get install icedtea-8-plugin
After this, you can bank check Java version and Javac version. Here, are the required commands and the expected results:
$ java -version #-> java version "1.seven.0_95" #-> OpenJDK Runtime Environs (IcedTea 2.half-dozen.4) (7u95-2.half-dozen.4-3) #-> OpenJDK 64-Bit Server VM (build 24.95-b01, mixed mode) $ javac -version
#-> javac 1.vii.0_95
Sometimes you need to run "sudo update-alternatives –config javac" to modify javac. Simply right now, it is not needed.
Next, we would at present add Oracle'due south JDKs. For that, you want to add one ppa, i.due east:
$ sudo add-apt-repository ppa:webupd8team/coffee
Now, permit's update the apt-get sources:
$ sudo apt-get update
Side by side, we would exist installing Oracle Java6, Java7 and Java8 i by one:
Hither are the following commands you lot need to run:
$ sudo apt-become install oracle-java6-installer $ sudo apt-get install oracle-java7-installer $ sudo apt-get install oracle-java8-installer
Please note that y'all would not typically install all of these on the server. You would typically install Open JDK 8. In this tutorial, you're taught to practise so because if yous require any specific JDK for your project you would be able to practice information technology.
Now, we will check the update Java alternatives by running this command:
$ update-java-alternatives --list
You tin see that all the JDK versions are now available to utilise on this system.
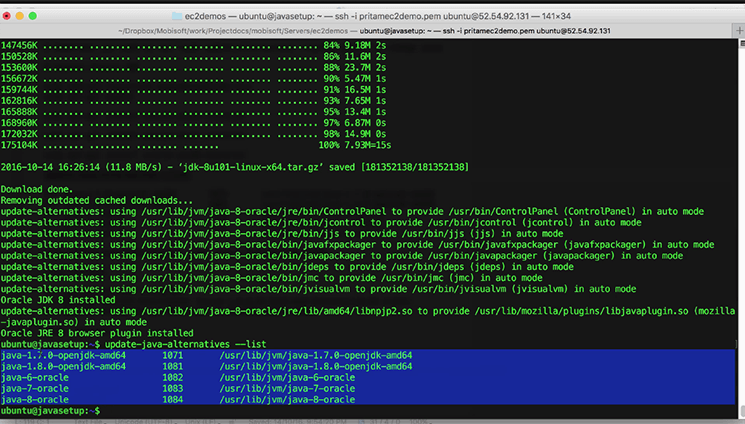
#-> java-ane.seven.0-openjdk-amd64 1071 /usr/lib/jvm/java-ane.vii.0-openjdk-amd64 #-> java-1.eight.0-openjdk-amd64 1081 /usr/lib/jvm/java-one.8.0-openjdk-amd64 #-> java-6-oracle 1082 /usr/lib/jvm/java-6-oracle #-> java-7-oracle 1083 /usr/lib/jvm/java-7-oracle #-> java-viii-oracle 1084 /usr/lib/jvm/java-viii-oracle
We would similar to use Open JDK 8, and so to set that upwardly nosotros need to run this command:
$ sudo update-java-alternatives --ready java-1.8.0-openjdk-amd64
Now, let'south check the coffee and javac versions. To run into, if it is right nosotros demand to run the following commands:
$coffee -version
Expected effect would be:
#-> openjdk version "1.8.0_91" #-> OpenJDK Runtime Environs (build 1.viii.0_91-8u91-b14-3ubuntu1~16.04.1-b14) #-> OpenJDK 64-Bit Server VM (build 25.91-b14, mixed fashion) $javac -version
Expected consequence would be:
#-> javac 1.8.0_101
Both java and javac versions are correct!
We are ready to install Tomcat. I take used this tutorial to install Tomcat
## https://www.digitalocean.com/community/tutorials/how-to-install-apache-tomcat-8-on-ubuntu-sixteen-04
I take fabricated some minor changes, for this tutorial, to suit our requirements. Allow's create this directory in our abode binder (~ denotes habitation folder), run the post-obit commands:
$ mkdir ~/software $ cd ~ $ pwd
Home folder would be /home/ubuntu for this user
Let's now download the Tomcat using the gyre command
$ whorl -O http://mirror.fibergrid.in/apache/tomcat/tomcat-8/v8.five.6/bin/apache-tomcat-8.5.6.tar.gz
Please note that you should get the latest download link from this (https://tomcat.apache.org/download-fourscore.cgi) page.
In one case it is downloaded, let'southward become dorsum to the habitation directory once again and create the opt directory past running the commands i past ane:
$ mkdir opt $ cd opt
And then to extract the Tomcat setup run this command:
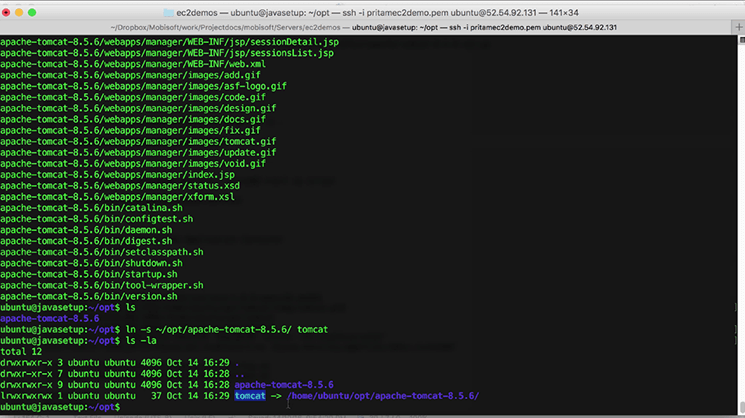
$ tar xvzf ~/software/apache-tomcat-8.5.6.tar.gz -C .
Afterward this, we volition create a symlink and then that we tin refer to apache-tomcat-viii.five.half dozen with merely Tomcat:
$ ln -s ~/opt/apache-tomcat-8.5.6/ tomcat $ ls -la
Post this, we are going to create the startup script for Tomcat. With Ubuntu sixteen.04, the way to showtime script has changed. The preferred manner to exercise information technology now is via systemd service. Earlier this, we used to create our script in /etc/init.d
This option is still bachelor but equally said before, the preferred style to do it is with systemd. Therefore, we would be using the same way of creating a startup script. For this, we basically need to create this file.
$ sudo half dozen /etc/systemd/system/tomcat.service
For this tutorial, I have already created this file. Note that, I have setup the following:
[Unit of measurement] Description=Apache Tomcat Web Awarding Container
After=network.target
[Service] Type=forking
Surround=JAVA_HOME=/usr/lib/jvm/java-1.8.0-openjdk-amd64
Environment=CATALINA_PID=/home/ubuntu/opt/tomcat/temp/tomcat.pid
Surroundings=CATALINA_HOME=/home/ubuntu/opt/tomcat
Environment=CATALINA_BASE=/home/ubuntu/opt/tomcat
Surround='CATALINA_OPTS=-Xms512M -Xmx1024M -server -Twenty:+UseParallelGC'
Surround='JAVA_OPTS=-Djava.awt.headless=truthful -Djava.security.egd=file:/dev/./urandom'
ExecStart=/home/ubuntu/opt/tomcat/bin/startup.sh
ExecStop=/home/ubuntu/opt/tomcat/bin/shutdown.sh
User=ubuntu
Group=ubuntu
UMask=0007
RestartSec=ten
Restart=always
[Install] WantedBy=multi-user.target
You might need to make some changes on this, on the basis of your project's requirements.
Now, let'due south reload the systemctl daemon by running this command:
$ sudo systemctl daemon-reload
Here, we can start Tomcat:
$ sudo systemctl start tomcat
It is upwardly and running. To check, run either
$ ps aux | grep tomcat
Or via
$ sudo systemctl status tomcat
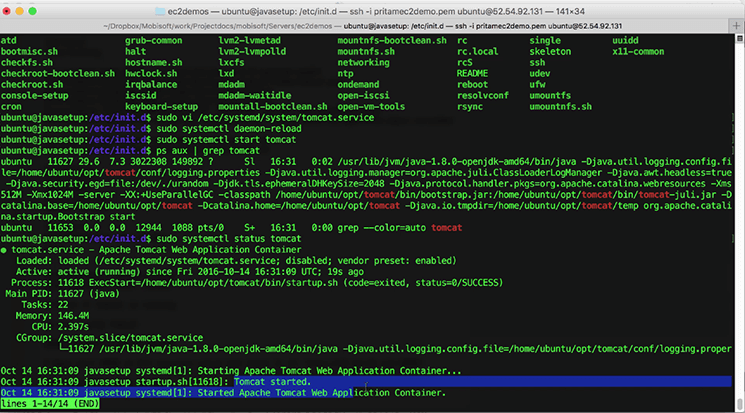
So, now Tomcat has started!
You may now want to bank check if Tomcat is running and if it is actually accessible just as you know, Tomcat runs on port 8080. And then, you would crave to open port 8080 in your security group.
Go to >> Security Group > Select the Security Grouping that you have created for the server > Edit inbound rules > Add a new TCP rule > Enter Port Range every bit 8080
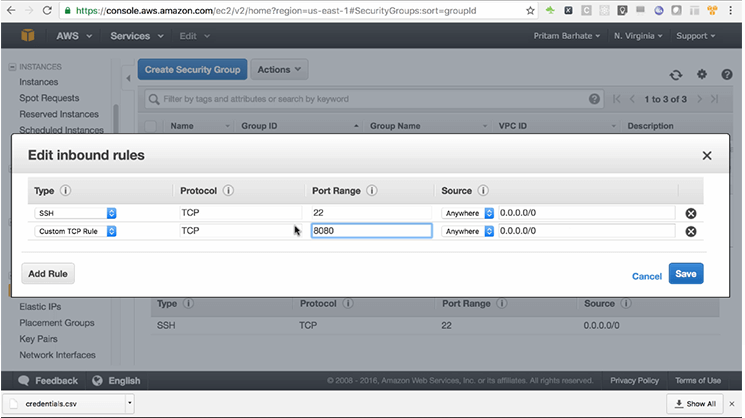
Allow information technology to be continued from 'anywhere' from the internet.
And then, at present if we get to our Elastic IP Address
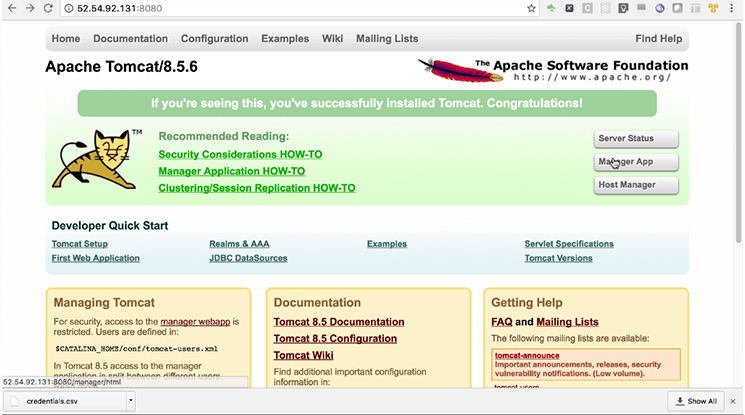
Open port 8080 in EC2 security group and check it at: http://52.54.92.131:8080/
We should see the "Tomcat page".
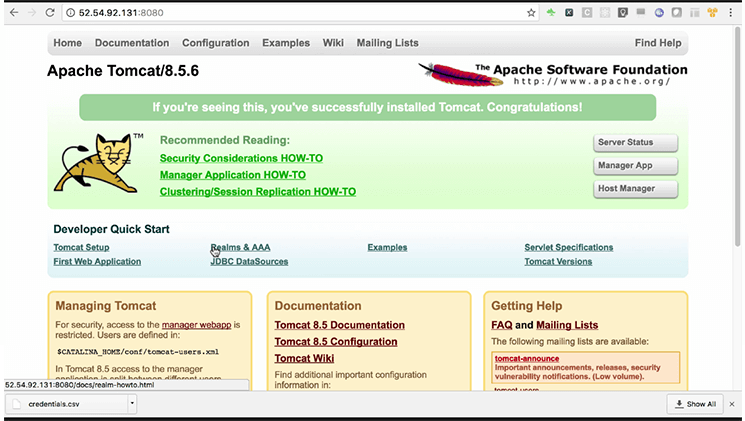
And it is there!
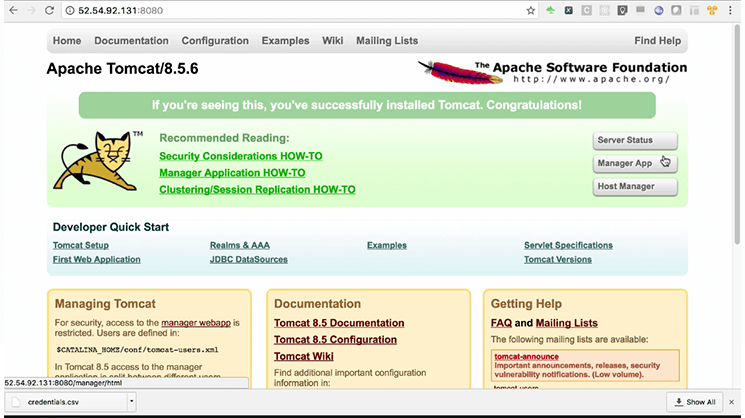
The "Manager App" should non be present here and should be stopped immediately for the reason that hackers looks for 8080 port and they try to hack this managing director app.
Hence, we need to delete it. If information technology is setup, we volition tell you lot how to delete it and restart Tomcat.
End the Tomcat.
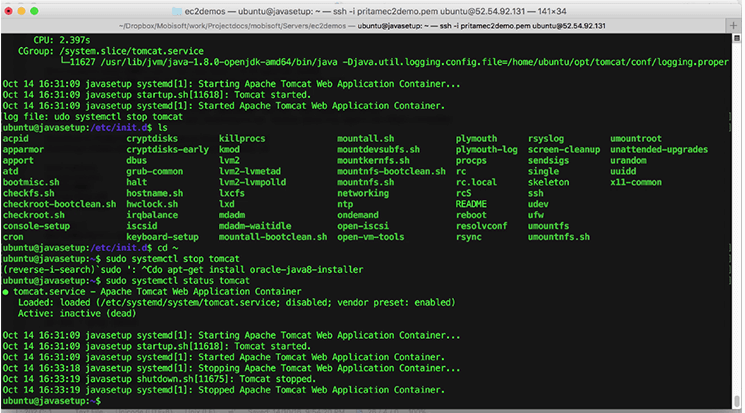
Run these commands to cease Tomcat:
$ sudo systemctl end tomcat $ cd ~/opt/tomcat $ cd webapps/ $ rm -rf managing director/ $ rm -rf docs/ $ rm -rf examples/ $ rm -rf host-director/ $ ls
At present, get back and refresh to check if Tomcat has stopped.
In one case it is stopped, let'south beginning Tomcat. Nosotros need to run this command:
$ sudo systemctl get-go tomcat
To check the status:
$sudo systemctl status tomcat
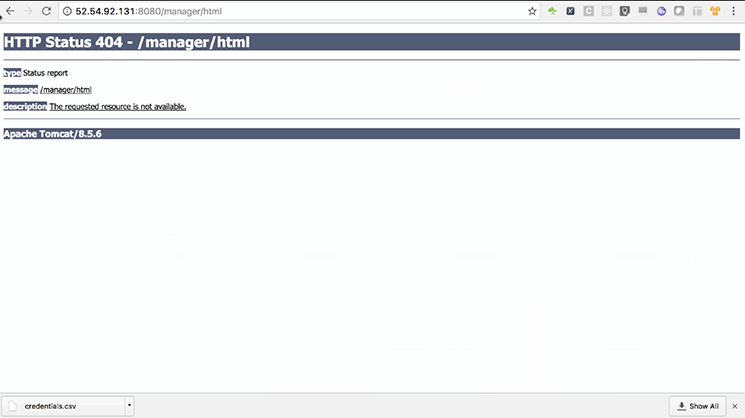
Tomcat is running and Manager app has stopped, you can run into it when you go to the browser and check!
This is critically important to remove 'Managing director App' so that hackers cannot get into our Tomcat instances. Anyway, we manage everything from the command line so we don't really demand this 'Managing director'.
So, that's it. Our Apache Tomcat Server is prepare for employ.
Author's Bio

Pritam Barhate, with an experience of 10+ years in engineering, heads Technology Innovation at Mobisoft Infotech. He has a rich experience in design and has been a consultant for a diverseness of industries and startups. At Mobisoft Infotech, he primarily focuses on technology resources and develops the near advanced solutions. Follow him @pritambarhate
Allow'southward Stay
Connected
Get our latest posts delivered right to your inbox.
Source: https://mobisoftinfotech.com/resources/mguide/set-apache-tomcat-based-jee-server-using-ubuntu-16-04-ec2-either-open-jdk-oracle-jdk/
0 Response to "How to Connect to Ec2 Tomcat Again"
Post a Comment